
Automating Development with a Single Jira Issue Key
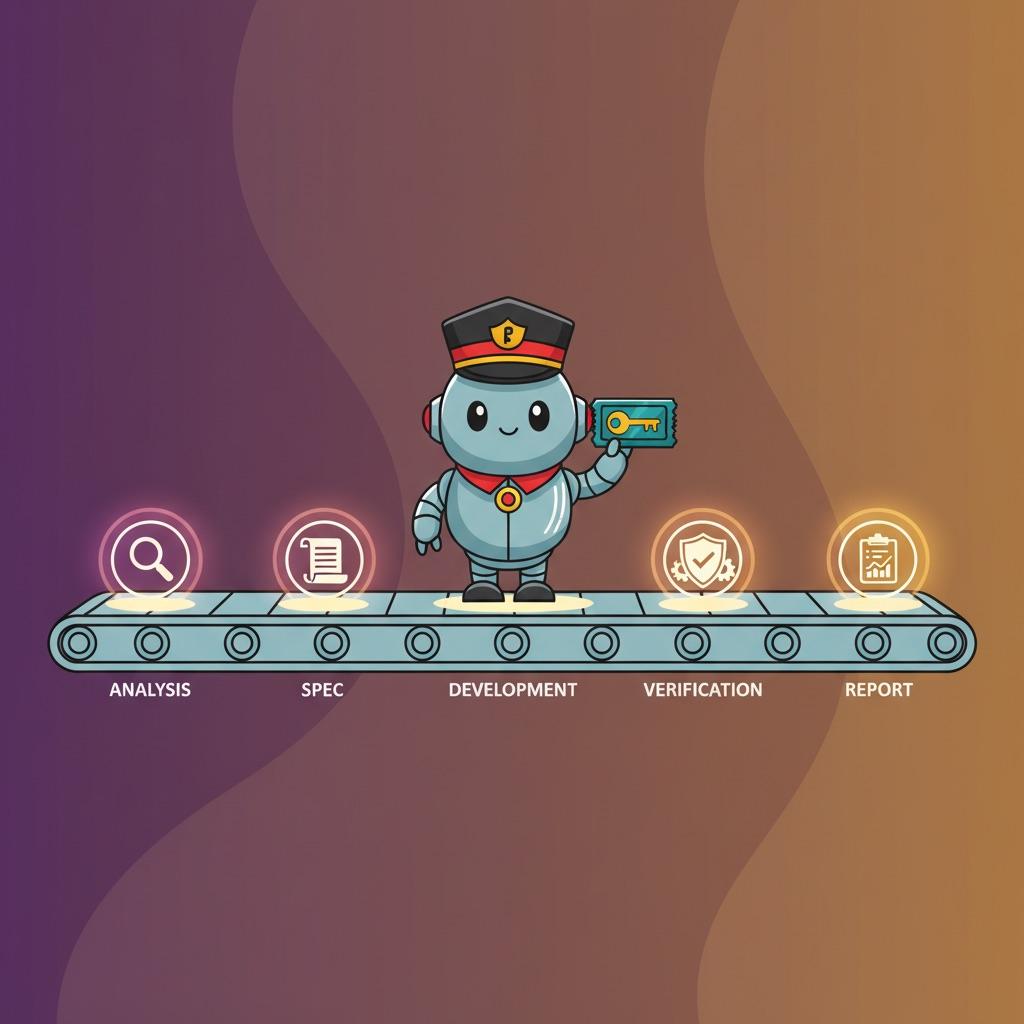
Enter a Jira issue key. The agent calls the Jira API to automatically collect the issue body, comments, attachments, linked issues, and change history. It analyzes the collected data and source code to write a development specification, then cross-checks it itself. From that specification, it creates a file-by-file development plan and verifies the plan too. It creates an isolated environment with a Git worktree, writes the code, and takes it through five stages of verification: functionality, types, security, performance, and code quality. Finally, it generates a completion report covering the entire process.
All the human did was enter the issue key.
지라 이슈 키 입력
  │
  ├─ 1. 이슈 컨텍스트 수집 ─── 지라 API → context.json + report.md
  │
  ├─ 2. 스펙 생성 ──────────── 컨텍스트 + 코드 분석 → spec.md
  ├─ 3. 스펙 리뷰 ──────────── 팩트 체크 + 범위 검증 → APPROVED / REGENERATE
  │
  ├─ 4. BDD 시나리오 ────────── Given-When-Then 도출 (조건부)
  ├─ 5. 개발 계획 ──────────── 파일 단위 태스크 + 코드 스니펫 → dev-plan.md
  ├─ 6. 계획 리뷰 ──────────── 스펙 커버리지 + 경로 검증 → APPROVED / REGENERATE
  │
  ├─ 7. 격리 환경 구성 ─────── Git worktree + 의존성 설치
  ├─ 8. 자동 개발 ──────────── TDD 사이클, 태스크 단위 커밋
  │
  ├─ 9. 5단계 검증 ─────────── 기능 → 타입 → 보안 → 성능 → 품질
  ├─ 10. E2E 테스트 ─────────── 브라우저 자동화 (조건부)
  │
  └─ 11. 완료 보고서 ────────── 전체 산출물 종합 + HTML 시각화
This post shares the four design principles behind the pipeline and how to implement it using the Claude Code skill system.
Harness Engineering: What Did I Actually Build?
My earlier post, Harness Engineering: The Developer's New Role in the Age of AI Agents, introduced the concept. The model is the CPU; the harness is the OS. Harness engineering means designing everything outside the agent: CI, linters, tests, observability, and AGENTS.md.
The concept makes sense, but a question remains: **“What should I actually build?”** This post answers that question. It documents a practical implementation of harness-engineering principles in Jira-driven development automation.
The Problem I Wanted to Solve
Most AI coding workflows currently look like this.
"이 지라 이슈 보고 코드 만들어줘" → 코드 생성 → 끝
There are two problems.
First, the context bottleneck. Open a Jira issue. Requirements are in the body, additional explanations from the product planner are in the comments, screen designs are in attachments, related bug reports are in linked issues, and revised acceptance criteria are in the change history. Even developers do not read all of this carefully. For AI, they copy and paste only the issue body. However sophisticated the prompt, incomplete input produces incomplete output.
Second, the limits of one-shot generation. Generate code without a specification, and requirements get missed. Generate tests without one, and coverage falls short. Human developers go through analysis → design → implementation → verification, yet we ask AI to “do everything in one go.”
Apply the core principles of harness engineering—structured context, architectural constraints, and feedback loops—to this problem, and you end up designing a stage-by-stage pipeline rather than a single prompt. Define each stage's inputs and outputs, put verification gates between stages, and create retry loops for failures. The harness defines the agent's sequence of work, quality standards, and input/output framework.
Four Design Principles
Here are the four principles I repeatedly relied on when applying general harness-engineering principles to this pipeline.
Principle 1: Automate Context Collection
Let the agent gather the context it needs itself.
Having humans organize and hand over context creates two problems. First, information loss: people pass along only what they consider important, leaving things out. Second, a bottleneck: however fast the agent is, it is bound by the speed of the human preparing its context.
The solution is to let the agent collect it directly. It automatically gathers the full issue data through the Jira API, reads the source code to identify the scope of impact, and analyzes DB schemas to understand the data structures.
The key principle is **“Collect broadly, refine in the next stage.”** Filtering during collection can omit important information because of a mistaken judgment. It is safer to fetch everything first and extract the relevant information during specification generation.
This principle extends beyond the explicit collection stage. An agent reading existing code to learn its patterns while planning development, or finding and referencing related files during automated development, is also automating context collection.
Principle 2: Refine in Stages
Build a pipeline in which each stage's output becomes the next stage's input.
Instead of generating code in one shot, progressively refine raw data → specification → plan → code. Each stage produces a clearly defined format, such as Markdown or JSON. A fixed format ensures the quality of the next stage's input.
This structure has another benefit: every intermediate artifact remains as a file. Specifications, plans, development logs, and verification results each have their own files, making it possible to trace where a decision was made afterward. When an agent generates incorrect code, you can trace back whether the specification, plan, or implementation was wrong.
Retaining intermediate artifacts also creates review points where a human can intervene. The entire process can run automatically, but a semi-automated mode is also possible, with a human checking the specification before proceeding.
Principle 3: Self-Verification Loops
Always include a stage that independently cross-checks the generated result.
AI gets things wrong with confidence. If generation and verification happen in the same context, the same bias lets the result pass. Even if it asks itself, “Is this specification correct?”, it answers yes because it wrote it.
The solution is to separate generation from verification.
스펙 생성 (Step 2) ──→ 스펙 리뷰 (Step 3)
                        │
                        ├─ APPROVED → 다음 단계로
                        ├─ REVISE → 리뷰어가 직접 수정
                        └─ REGENERATE → Step 2 재실행 (최대 2회)

개발 계획 (Step 5) ──→ 계획 리뷰 (Step 6)
                        └─ 동일한 판정 루프

자동 개발 (Step 8) ──→ 5단계 검증 (Step 9)
                        │
                        ├─ PASS → 다음 단계로
                        └─ FAIL → 수정 후 재검증 (최대 5회)
Verification evaluates the result from a different perspective than generation. Specification review focuses on fact checks such as “Does this file path actually exist?” and “Does this table actually exist?” It checks verifiable facts, rather than abstract judgments.
Capping retries matters. Without a cap, the system can loop forever or keep consuming tokens while repeating the same mistake. At the cap, escalate to a human. Explicitly saying “This stage cannot be resolved automatically” is better than proceeding on guesses.
Principle 4: Isolate the Environment
Isolate the automation environment from the original.
In a system where AI agents edit code directly, the greatest risk is contaminating the original. If incorrect code is applied directly to the original repository, it becomes difficult to undo.
Use Git worktrees to create an independent environment for each issue. Keep the original repository untouched and work in a separate branch and directory for every issue. If it fails, delete the worktree. If it succeeds, merge through a PR.
repos/                          ← 원본 (절대 수정하지 않음)
├── frontend/
├── backend/
└── ...

worktrees/                      ← 이슈별 독립 환경
├── PROJ-1234/
│   ├── reports/                ← 산출물 (스펙, 계획, 검증 결과)
│   ├── frontend/               ← git worktree (독립 브랜치)
│   └── backend/                ← git worktree (독립 브랜치)
└── PROJ-5678/
    └── ...
Even several issues can be worked on simultaneously without conflicts because each worktree has its own branch, dependencies, and directory.
Mapping Principles to the Pipeline
Here is where the four principles apply in the 11-stage pipeline. ● marks a stage's core principle; ○ marks a supporting principle.
| Pipeline stage | 1: Context automation | 2: Staged refinement | 3: Self-verification | 4: Environment isolation |
|---|---|---|---|---|
| Issue context collection | ● | ○ | ||
| Specification generation | ● | ● | ||
| Specification review | ● | |||
| BDD scenarios | ● | |||
| Development plan | ○ | ● | ||
| Plan review | ● | |||
| Isolated environment setup | ● | |||
| Automated development | ○ | ● | ● | |
| Five-stage verification | ● | ● | ||
| E2E tests | ● | ● | ||
| Report generation | ○ |
Pipeline Design in Detail
The following describes each stage's purpose, specific behavior, and input/output formats.
Issue context collection
This is the pipeline's starting point. It calls the Jira REST API v2 to automatically collect all data related to the issue.
Collection scope:
| Data | Collection method | Notes |
|---|---|---|
| Issue body | GET /rest/api/2/issue/{key} | description, summary, and custom fields |
| Comments | The comments field in the same API | Includes author and timestamp |
| Attachments | Download attachment URLs | Extract the full contents of text files |
| Linked issues | issuelinks field → recursive collection to a depth of 1 | Includes linked issue bodies and comments |
| Change history | expand=changelog | Which fields changed, when, and how |
| External URLs | Crawl URLs in the body and comments | Reference documents, design links, etc. |
The output is generated in two formats.
{
  "issue": {
    "key": "PROJ-1234",
    "summary": "주문 상세 페이지에 배송 추적 기능 추가",
    "description": "...",
    "type": "feature"
  },
  "comments": [
    { "author": "PM Kim", "body": "배송사 API 연동 필요", "created": "2026-03-28" }
  ],
  "attachments": [
    { "filename": "shipping-ui-design.html", "content": "..." }
  ],
  "linked_issues": [
    { "key": "PROJ-1100", "summary": "배송사 API 인증 구현", "relation": "is blocked by" }
  ],
  "changelog": [
    { "field": "description", "from": "...", "to": "...", "date": "2026-03-30" }
  ]
}
## PROJ-1234: 주문 상세 페이지에 배송 추적 기능 추가
### 이슈 요약
- 유형: feature
- 보고자: PM Kim
- 생성일: 2026-03-25
### 댓글 (3건)
1. PM Kim (03-28): 배송사 API 연동 필요
...
### 연결 이슈 (1건)
- PROJ-1100: 배송사 API 인증 구현 (is blocked by)The design principle is **“Collect broadly, refine in the next stage.”** This stage does not judge which information is important. That judgment belongs to specification generation.
Specification Generation + Specification Review
This is the most important stage of the pipeline. It turns the collected context into a specification ready for development.
Inputs to specification generation:
- context.json (output of the previous stage)
- Source-code analysis (the agent reads the codebase directly to identify the impact scope)
- DB schema (inspect the database structure if needed)
Specification-generation output (spec.md):
| Section | Contents |
|---|---|
| Issue classification | One of feature / bug / enhancement / refactor |
| Requirements | Functional requirements extracted from Jira data |
| Acceptance criteria | List of completion conditions |
| Impact scope | Files, modules, and APIs that need changes |
| Technical decisions | Design choices and their rationale |
| TDD/BDD/E2E flags | Test strategy based on issue type |
Test strategy by issue type:
| Issue type | TDD | BDD | E2E |
|---|---|---|---|
| feature | O | O | O |
| enhancement | O | Conditional | O |
| bug | X | X | Conditional |
| refactor | O | X | X |
This classification determines whether BDD scenario generation and E2E tests run conditionally later.
Specification review cross-checks the generated specification. It uses a verifiable checklist rather than abstract judgment.
| Check | Verification method |
|---|---|
| Whether file paths exist | Check the actual file system |
| Whether tables and columns exist | Query the DB schema |
| Whether API endpoints exist | Check the router code |
| Requirements completeness | Whether every item in context.json is reflected in the specification |
| Accuracy of issue classification | Compare against the original Jira data |
There are three decisions: APPROVED proceeds to the next stage, REVISE lets the reviewer edit directly, and REGENERATE regenerates the specification from scratch. REGENERATE is allowed at most 2 times; if it still does not pass, the issue is escalated to a human.
BDD + Development Plan + Plan Review
Once finalized, the specification is converted into an executable plan.
BDD scenarios are generated only for feature and enhancement issues. The specification's acceptance criteria are converted into Given-When-Then form.
Feature: 주문 상세 페이지 배송 추적

  Scenario: 배송 중인 주문의 추적 정보 표시
    Given 주문 번호 "ORD-001"이 배송 중 상태이다
    When 사용자가 주문 상세 페이지를 연다
    Then 배송 추적 정보가 표시된다
    And 현재 배송 위치가 지도에 표시된다

  Scenario: 배송 전 주문은 추적 정보 없음
    Given 주문 번호 "ORD-002"가 결제 완료 상태이다
    When 사용자가 주문 상세 페이지를 연다
    Then "배송 준비 중" 메시지가 표시된다
    And 배송 추적 섹션은 비활성화된다
The **development plan (dev-plan.md)** breaks the specification into file-level tasks. Each task includes the files to change, the changes required, and runnable code snippets. The standard is clear: “Detailed enough that an outside developer could implement it from this plan alone.”
### Task 3: 배송 추적 API 엔드포인트 추가

**파일:**
- Create: `app/routers/shipping.py`
- Modify: `app/main.py` (라우터 등록)
- Test: `tests/routers/test_shipping.py`

**단계:**
1. Pydantic 스키마 정의
   - ShippingTrackingResponse: tracking_id, status, location, updated_at
2. 라우터 함수 구현
   - GET /api/orders/{order_id}/shipping
   - 배송사 API 호출 → 응답 변환 → 반환
3. main.py에 라우터 등록
4. 테스트 작성 및 실행
Plan review checks two things: whether every requirement in the specification has been broken into tasks (coverage), and whether the file paths in those tasks actually exist (fact-checking). It uses the same APPROVED / REVISE / REGENERATE decisions as specification review.
Isolated Environment + Automated Development
Once the plan is finalized, prepare the environment in which the code will be written.
Isolated environment setup:
- Create Git worktrees only for projects within the specification's impact scope
- Create a branch based on the issue key (for example,
developer/PROJ-1234) - Install dependencies (npm install, pip install, etc.)
- Provision environment variables
For an issue that changes the frontend, create worktrees for both the frontend and backend, because API tests need the backend.
Automated development executes the plan's tasks in sequence.
| Issue type | Development approach |
|---|---|
| feature (subject to TDD) | RED → GREEN cycle: write a failing test → write code that passes it |
| bug | Modify code → verify |
| Other | Write code → verify |
Create a commit for each task and include the issue key in the commit message.
feat(shipping): 배송 추적 API 엔드포인트 추가

JIRA: PROJ-1234
Five-Stage Verification + E2E Tests
Once the code is complete, run five consecutive verification stages. Run all of them in the order 1 → 2 → 3 → 4 → 5, without stopping midway.
| Stage | What is checked | Method |
|---|---|---|
| 1. Functionality | Whether all specification requirements are met | Compare against the acceptance-criteria checklist |
| 2. Types | Type safety | tsc --noEmit (TS), mypy (Python) |
| 3. Security | OWASP Top 10 vulnerabilities | Check for SQL injection, XSS, missing authentication, etc. |
| 4. Performance | Performance antipatterns | N+1 queries, infinite loops, memory leaks, etc. |
| 5. Code quality | Adherence to project patterns | Function length, duplication, and naming conventions |
If even one stage fails, fix the code and rerun all five stages from the beginning. There is no partial revalidation: a security fix can break functionality, and a performance improvement can break types.
Retries are capped at 5. After 5 failures, mark the work “unable to complete development automatically” and escalate to a human. Record where it failed and what was attempted in the report.
E2E tests use browser automation. Start the server, open it in a browser, check for console and network errors, and capture screenshots of the main screens. This stage applies only to feature/enhancement issues with a UI.
Report generation
This is the pipeline's final stage. It consolidates every artifact from the preceding 10 stages.
The completion report includes:
- Issue summary and classification
- Key specification details
- Changed-file list and git commit log
- Five-stage verification results (passes and failures)
- E2E test screenshots, where applicable
- Retry and escalation history
It also generates a visual HTML report. This is a single HTML file with images and screenshots embedded inline, so you can open it directly in a browser to review the full work history.
Error-Handling Strategy
Error handling is central to a system that runs 11 stages automatically. A unified strategy applies throughout the pipeline.
| Error type | Example | Response |
|---|---|---|
| External system failure | Jira API unavailable, DB connection failure | Stop immediately and escalate to a human |
| Insufficient quality | REGENERATE in specification review, verification failure | Regeneration loop with a per-stage retry limit |
| Unable to execute | File-path mismatch, dependency installation failure | Stop immediately and escalate with the error message |
| Noncritical failure | Report visualization error | Log a warning and continue |
The core principle is **“Do not guess.”** If a file path does not exist, stop instead of guessing a similar path. If a test fails unexpectedly, stop instead of guessing the cause. Code an agent creates by proceeding on guesses causes bigger problems later.
Implementation Guide: The Claude Code Skill System
Here is how to implement this pipeline using Claude Code's custom slash-command (skill) system.
Skill Architecture Overview
Claude Code skills are Markdown files in the .claude/skills/ directory. They can be invoked with /슬래시 커맨드 and serve as instructions for the agent to read and follow.
.claude/
└── skills/
    ├── orchestrator/            # 마스터 스킬 (유일한 진입점)
    │   └── SKILL.md
    ├── jira-collector/          # 이슈 컨텍스트 수집
    │   ├── SKILL.md
    │   └── scripts/
    │       ├── collect.py       # 지라 API 수집 스크립트
    │       └── api_client.py    # HTTP 클라이언트
    ├── spec-generator/          # 스펙 생성
    │   └── SKILL.md
    ├── spec-reviewer/           # 스펙 리뷰
    │   └── SKILL.md
    ├── bdd-explorer/            # BDD 시나리오 (조건부)
    │   └── SKILL.md
    ├── dev-planner/             # 개발 계획
    │   └── SKILL.md
    ├── plan-reviewer/           # 계획 리뷰
    │   └── SKILL.md
    ├── worktree-creator/        # 격리 환경 구성
    │   ├── SKILL.md
    │   └── scripts/
    │       └── create-worktree.sh
    ├── developer/               # 자동 개발
    │   ├── SKILL.md
    │   └── references/          # 프로젝트별 코딩 가이드
    │       ├── backend.md
    │       └── frontend.md
    ├── verifier/                # 5단계 검증
    │   ├── SKILL.md
    │   └── references/
    │       ├── security-checklist.md
    │       └── quality-checklist.md
    ├── e2e-tester/              # E2E 테스트 (조건부)
    │   └── SKILL.md
    └── reporter/                # 보고서 생성
        └── SKILL.md
The core structure is that each skill is independent. Skills pass data through the file system: spec-generator reads the context.json created by jira-collector, and dev-planner reads the spec.md created by spec-generator.
The Structure of a SKILL.md File
SKILL.md is an instruction document, rather than code. It is Markdown that the agent reads and follows, defining procedures, output formats, and error conditions in natural language.
---
name: spec-generator
description: 수집된 컨텍스트를 기반으로 개발 명세서를 생성한다
---

## 입력
- `{REPORTS_DIR}/research/jira/context.json` — 지라 수집 데이터
- 소스 코드 — 에이전트가 직접 코드베이스를 읽어 분석

## 실행 절차
1. context.json을 읽고 이슈 유형을 분류한다 (feature/bug/enhancement/refactor)
2. 이슈 유형에 따라 TDD/BDD/E2E 플래그를 결정한다
3. 영향 범위에 해당하는 소스 코드를 읽어 현재 구조를 파악한다
4. 아래 템플릿에 맞춰 spec.md를 작성한다

## 출력
- `{REPORTS_DIR}/spec/spec.md`

## 출력 포맷
(마크다운 템플릿 정의)

## 에러 처리
- 소스 코드 경로를 찾을 수 없으면 즉시 중단하고 보고한다
- context.json이 비어있으면 이전 단계 실패로 판단하고 중단한다
The same structure applies to all 11 skills: four sections for inputs, procedure, outputs, and errors.
The Orchestrator Pattern
The orchestrator is a master skill that invokes the 11 skills in sequence. When the user enters /orchestrator PROJ-1234, it runs the remaining 10 skills in order.
Step 1:  /jira-collector      → context.json 생성
Step 2:  /spec-generator       → spec.md 생성
Step 3:  /spec-reviewer        → APPROVED?
         └─ NO → Step 2 재실행 (max 2)
Step 4:  if spec.BDD == true
         └─ /bdd-explorer      → bdd-scenarios.md
Step 5:  /dev-planner          → dev-plan.md
Step 6:  /plan-reviewer        → APPROVED?
         └─ NO → Step 5 재실행 (max 2)
Step 7:  /worktree-creator     → 격리 환경 준비
Step 8:  /developer            → 코드 작성 + 커밋
Step 9:  /verifier             → 5단계 검증
         └─ FAIL → 수정 후 재검증 (max 5)
Step 10: if spec.E2E == true
         └─ /e2e-tester        → 테스트 보고서
Step 11: /reporter             → 완료 보고서
Conditional execution (Steps 4 and 10) and retry loops (Steps 3, 6, and 9) are the heart of the orchestrator. It checks each stage's output and decides the next stage according to the conditions. If a blocker occurs, it stops immediately and reports to a human.
The Jira API Integration Skill
Jira data collection is implemented as a Python script and executed through Bash from the skill. It uses only the Python standard library—urllib and json—with no external dependencies, because it needs to run in the deployment environment without installing packages.
import urllib.request
import json
import base64

class JiraClient:
    def __init__(self, server_url, username, password):
        self.server_url = server_url
        credentials = base64.b64encode(
            f"{username}:{password}".encode()
        ).decode()
        self.headers = {
            "Authorization": f"Basic {credentials}",
            "Content-Type": "application/json"
        }

    def get_issue(self, key, expand="renderedFields,changelog"):
        url = f"{self.server_url}/rest/api/2/issue/{key}?expand={expand}"
        req = urllib.request.Request(url, headers=self.headers)
        with urllib.request.urlopen(req) as resp:
            return json.loads(resp.read())

    def search_issues(self, jql, fields=None, max_results=50):
        url = f"{self.server_url}/rest/api/2/search"
        data = json.dumps({"jql": jql, "maxResults": max_results})
        req = urllib.request.Request(
            url, data=data.encode(), headers=self.headers
        )
        with urllib.request.urlopen(req) as resp:
            return json.loads(resp.read())
def collect(jira_key, config, output_dir):
client = JiraClient(**config["jira"])
# 1. 메인 이슈 수집
issue = client.get_issue(jira_key)
# 2. 댓글 추출
comments = extract_comments(issue)
# 3. 첨부파일 다운로드 + 텍스트 추출
attachments = download_attachments(issue, output_dir)
# 4. 연결 이슈 1-depth 수집
linked = collect_linked_issues(client, issue)
# 5. 변경 이력 추출
changelog = extract_changelog(issue)
# 6. 외부 URL 크롤링
urls = extract_and_fetch_urls(issue, comments)
# 7. context.json 저장
context = {
"issue": normalize_issue(issue),
"comments": comments,
"attachments": attachments,
"linked_issues": linked,
"changelog": changelog,
"external_urls": urls
}
save_json(context, f"{output_dir}/context.json")
# 8. report.md 생성
generate_report(context, f"{output_dir}/report.md")The skill's SKILL.md invokes the script as follows:
## 실행 절차
1. config.json에서 지라 서버 URL과 인증 정보를 읽는다
2. 다음 명령으로 수집 스크립트를 실행한다:
   `python scripts/collect.py --key {JIRA_KEY} --output {REPORTS_DIR}/research/jira`
3. 실행 결과를 확인한다:
   - context.json이 생성되었는지 확인
   - 이슈 본문이 비어있지 않은지 확인
4. 에러 시 즉시 중단하고 에러 메시지를 보고한다
The Specification-Generation Skill
This skill synthesizes context.json and code-analysis results to create spec.md. The key is to enforce the output format with a template.
Define a Markdown template for spec.md in SKILL.md, and the agent writes to that structure. Include section order, required items, and flag formats in the template.
## 이슈 분류
- 유형: {feature | bug | enhancement | refactor}
- TDD: {O | X}
- BDD: {O | X}
- E2E: {O | X}

## 요구사항
(context.json에서 추출한 기능 요구사항을 번호 목록으로)

## 수용 기준
(완료 조건을 체크리스트 형태로)

## 영향 범위
| 프로젝트 | 파일 | 변경 내용 |
|----------|------|-----------|
(에이전트가 코드 분석 후 채움)

## 기술 결정사항
(설계상 선택과 근거)
Issue-classification logic is also defined in natural language in SKILL.md:
## 이슈 분류 기준
- **feature**: 새로운 기능 추가 (기존에 없던 화면, API, 로직)
- **bug**: 기존 기능의 오작동 수정
- **enhancement**: 기존 기능의 개선 (UI 변경, 성능 개선, UX 개선)
- **refactor**: 동작 변경 없이 코드 구조 개선

분류에 따른 플래그:
- feature → TDD: O, BDD: O, E2E: O
- bug → TDD: X, BDD: X, E2E: UI 관련이면 O
- enhancement → TDD: O, BDD: 사용자 시나리오 변경이 있으면 O, E2E: O
- refactor → TDD: O, BDD: X, E2E: X
The Verification Skill
The verification skill defines the checklist for each of the five stages in SKILL.md, and the agent executes them in sequence.
### Stage 3: 보안 검증 (OWASP Top 10)

다음 체크리스트를 변경된 코드에 적용한다:

- [ ] SQL 쿼리에 파라미터 바인딩 사용 여부
- [ ] 사용자 입력의 XSS 이스케이핑 여부
- [ ] 인증/인가 게이트 존재 여부 (API 엔드포인트)
- [ ] CSRF 토큰 검증 여부 (상태 변경 요청)
- [ ] 민감 정보(비밀번호, 토큰) 로깅 여부
- [ ] 파일 업로드 검증 여부 (타입, 크기)

위반 항목이 있으면:
1. 위반 내용과 파일:라인 번호를 기록한다
2. 코드를 수정한다
3. FAIL로 판정한다 (전체 5단계 재실행 트리거)
The orchestrator controls the retry loop. The verification skill returns only PASS or FAIL; on FAIL, the orchestrator runs the fix → reverify loop.
The Remaining Skills and Customization Points
The three skills covered above—collection, specification generation, and verification—represent the pipeline's main patterns. The remaining skills follow the same structure: define inputs, procedure, outputs, and errors in SKILL.md, read the previous stage's output files, and execute the next stage.
Points readers can adapt to their own projects:
| What to customize | Example |
|---|---|
| Verification checklists | Add security and quality checks suited to the project |
| Conditions for BDD | Adjust which issue types use BDD |
| Commit message format | Adapt to the team's commit conventions |
| Issue-classification criteria | Map to the organization's issue types |
| Review decision criteria | Adjust REGENERATE thresholds and retry counts |
| Coding guide | Add project-specific rules to the references/ directory |
Managing Cost and Tokens
One run of the 11-stage pipeline makes numerous LLM calls. Without attention to cost, a single issue can consume tens of dollars.
Cost-optimization strategies:
| Strategy | Application | Effect |
|---|---|---|
| Run tools first | Use tsc --noEmit for type checking and eslint for linting | Handle 2 of the 5 verification stages without an LLM |
| Separate context collection | Collect Jira data with a Python script and no LLM calls | Zero token cost for collection |
| Conditional execution | Skip BDD/E2E according to issue type | Save 2 stages for bug/refactor issues |
| Retry caps | Fix the maximum retry count per stage | Prevent runaway costs from infinite loops |
Actual costs vary greatly with project size, issue complexity, and model choice. I recommend starting with simple issues, measuring token consumption by stage, and expanding gradually.
Success Metrics
Four metrics for judging whether the workflow is working:
| Metric | Meaning | Signal for improvement |
|---|---|---|
| Pipeline completion rate | Share of runs completing all 11 stages without human intervention | Low → improve skills in stages that fail frequently |
| First-pass verification rate | Share passing all five verification stages without a retry | Low → strengthen the development skill's coding guide |
| Human escalation frequency | Where the pipeline most often stops | Concentrated in one stage → improve that skill's instructions |
| PR merge rate | Share of automatically generated changes that pass review and are merged | Low → improve quality in the specification and planning stages |
Accumulating these metrics in reports provides evidence for improving the workflow. “The first-pass verification rate rose from 40% to 70%” quantifies the effect of strengthening the development skill's coding guide.
Wrapping Up
This 11-stage pipeline is the result of applying harness-engineering principles—structured context, architectural constraints, and feedback loops—to Jira-driven development automation.
Instead of asking the agent once to “write the code,” design an analysis → generation → verification pipeline as its harness.
Automatically collect context, refine it in stages, verify at every stage, and execute in an isolated environment. Each stage's output becomes the next stage's input. Retry on failure, and hand it to a human if retries cannot resolve it.
Ultimately, building a harness means defining **“what a good development process is”** in code. It turns the analysis → design → implementation → verification flow that human developers followed implicitly into a pipeline an agent can follow explicitly. The essence of software engineering does not change in the AI era. What changes is who carries it out.

Comments
Korean and English pages share this conversation.
Loading comments…