

This post covers moving a Next.js blog to an Ubuntu server and building CI/CD with GitHub Actions + SSH + pm2.
Final Architecture
The final setup works as follows.
[로컬 개발환경] --- git push ---> [GitHub (blog-nextjs)]

GitHub Actions
  1. npm ci / lint / build
  2. SSH 로 집 서버 접속
  3. git reset --hard origin/main
  4. npm ci && npm run build
  5. pm2 reload blog

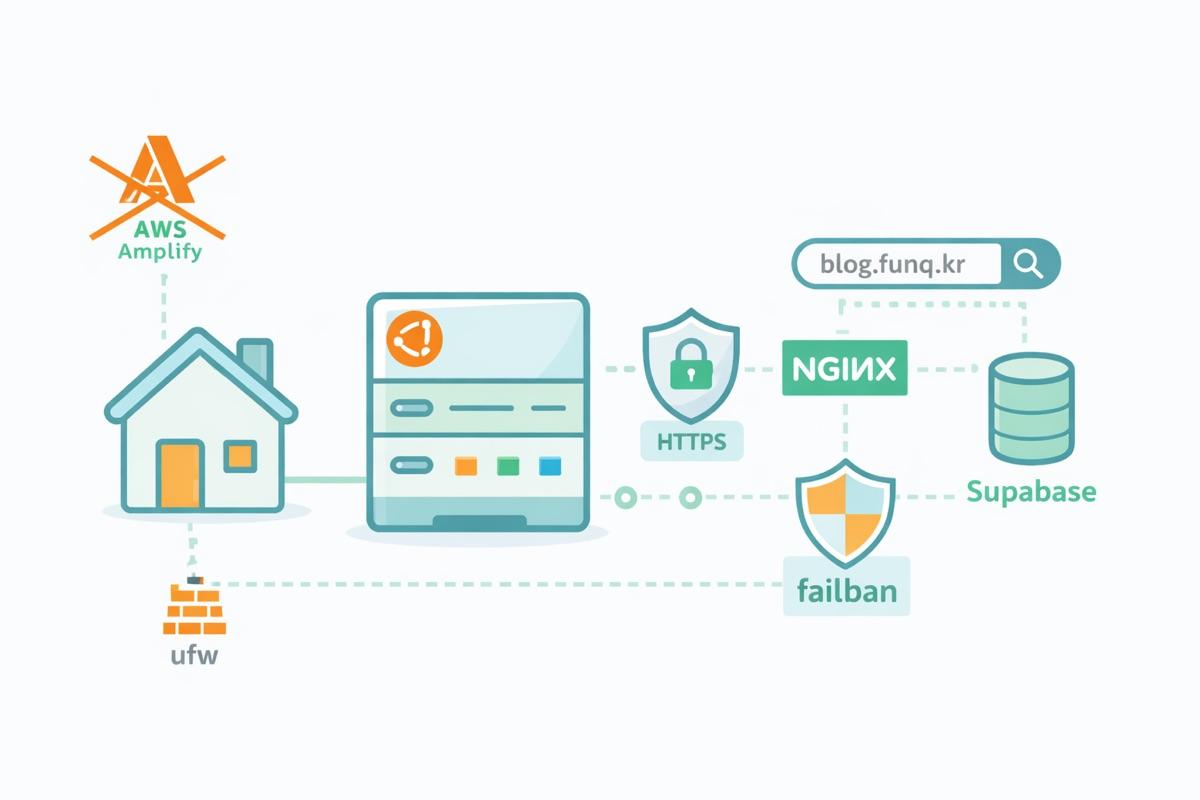
[집 Ubuntu 서버]
  - Nginx (HTTPS, blog.funq.kr)
      └─ Next.js (pm2로 구동 중, 포트 3000)
  - Supabase (외부 매니지드 DB)
  - fail2ban / ufw 로 기본 보안
Prerequisites
This post assumes the following are already in place.
- Domain: blog.funq.kr
- GitHub repository: nasodev/blog-nextjs
- Server
- Ubuntu Server 24.04 LTS
- Non-root user: funq
- Project path: /home/funq/dev/blog-nextjs
- Node.js, npm, and pm2 installed using nvm
- Next.js server running through pm2 start
- Nginx
- Reverse proxy from https://blog.funq.kr to http://127.0.0.1:3000
- Let's Encrypt TLS configured with certbot
- Supabase
- Project and database restored
- The following values present in .env.local
NEXT_PUBLIC_SUPABASE_URL=...
NEXT_PUBLIC_SUPABASE_ANON_KEY=...
The goal now is to add an automated deployment pipeline.
1. Set Up SSH for the Server to Pull from GitHub
1-1. Create a Deployment SSH Key on the Server
On the Ubuntu server as funq:
ssh funq@192.168.0.2

cd ~/.ssh
ssh-keygen -t ed25519 -C "blog-nextjs-server"
# 파일명: id_ed25519 (기본값 사용)
# passphrase: 비워두고 Enter 두 번
View the public key:
cat ~/.ssh/id_ed25519.pub
# ssh-ed25519 AAAA... blog-nextjs-server
1-2. Register a Deploy Key in the GitHub Repository
On GitHub, open the nasodev/blog-nextjs repository:
- Settings → Deploy keys → Add deploy key
- Title: blog-nextjs-server
- Key: the entire ssh-ed25519 ... line you just copied
- Allow write access
- Leave it unchecked if the server does not need to push (read-only)
- Read-only is sufficient here
1-3. Change the Server's Git Remote to SSH
cd /home/funq/dev/blog-nextjs

git remote set-url origin git@github.com:nasodev/blog-nextjs.git
git pull   # 패스워드 없이 잘 되면 성공
The server can now fetch code from GitHub without a token.
2. SSH Keys and Port Forwarding for GitHub Actions Deployment
For CI to connect to the server over SSH, it needs a dedicated GitHub Actions SSH key and port forwarding on the router.
2-1. Generate a CI SSH Key on the MacBook
On the MacBook:
cd ~/.ssh
ssh-keygen -t ed25519 -C "github-actions-to-blog-server"
# 파일명: id_ed25519_blog_ci
# passphrase: 비워두고 Enter 두 번
Generated files:
~/.ssh/id_ed25519_blog_ci← private key (GitHub Secret)~/.ssh/id_ed25519_blog_ci.pub← public key (server authorized_keys)
2-2. Register the Public Key on the Server
# 맥에서 공개키 확인
cat ~/.ssh/id_ed25519_blog_ci.pub
# 한 줄 전체 복사

# 서버에 접속
ssh funq@192.168.0.2

mkdir -p ~/.ssh
chmod 700 ~/.ssh

nano ~/.ssh/authorized_keys
# 맨 아래 줄에 붙여넣기

chmod 600 ~/.ssh/authorized_keys
Anyone with this key can now SSH into the server as funq.
2-3. Configure SSH Port Forwarding on the Router
Example for ipTIME:
- Menu: Advanced Settings → NAT/Router Management → Port Forwarding Settings
- Add a rule:
- Service name: ssh-ci
- Internal IP: 192.168.0.2 (Ubuntu server)
- Internal port: 22
- External port: 2001 (use a different port instead of 22 for security)
- Protocol: TCP
→ Connect externally to blog.funq.kr:2001 → the router forwards it to 192.168.0.2:22.
3. Configure GitHub Secrets
3-1. SSH_KEY (Private Key)
View the private key on the Mac:
cat ~/.ssh/id_ed25519_blog_ciGitHub repository → Settings → Secrets and variables → Actions → New repository secret
- Name:
SSH_KEY - Value: the entire private key copied above
3-2. SSH_HOST, SSH_USER, and Optional SSH_PORT
Add Secrets on the same screen.
SSH_HOST= blog.funq.krSSH_USER= funqSSH_PORT= 2001, if used
3-3. Supabase Environment Variables
Since the Supabase-dependent build must also run in CI, register the Supabase URL and key as Secrets.
After checking their values in the Supabase dashboard:
NEXT_PUBLIC_SUPABASE_URLNEXT_PUBLIC_SUPABASE_ANON_KEY
Add them to Secrets under those exact names.
4. Write the GitHub Actions Workflow
Now add a CI/CD workflow file to the repository.
4-1. Create the Directory
Locally, on the Mac or server:
cd ~/dev/blog-nextjs
mkdir -p .github/workflows
4-2. Write deploy.yml
.github/workflows/deploy.yml:
name: Deploy blog-nextjs

on:
  push:
    branches: [ main ]

jobs:
  build-and-deploy:
    runs-on: ubuntu-latest

    # 빌드에 필요한 환경변수 (Supabase)
    env:
      NEXT_PUBLIC_SUPABASE_URL: ${{ secrets.NEXT_PUBLIC_SUPABASE_URL }}
      NEXT_PUBLIC_SUPABASE_ANON_KEY: ${{ secrets.NEXT_PUBLIC_SUPABASE_ANON_KEY }}

    steps:
      - name: Checkout repo
        uses: actions/checkout@v4

      - name: Setup Node
        uses: actions/setup-node@v4
        with:
          node-version: 20
          cache: npm

      - name: Install dependencies
        run: npm ci

      - name: Lint
        run: npm run lint

      - name: Build
        run: npm run build

      - name: Deploy to server via SSH
        uses: appleboy/ssh-action@v1.0.3
        with:
          host: ${{ secrets.SSH_HOST }}
          username: ${{ secrets.SSH_USER }}
          key: ${{ secrets.SSH_KEY }}
          port: ${{ secrets.SSH_PORT }}   # 2222
          script: |
            # 1) nvm 초기화 (서버에서 npm/pm2 PATH 잡기)
            export NVM_DIR="$HOME/.nvm"
            [ -s "$NVM_DIR/nvm.sh" ] && . "$NVM_DIR/nvm.sh"

            # 2) 코드 최신 상태로 맞추고 빌드
            cd /home/funq/dev/blog-nextjs
            git fetch origin main
            git reset --hard origin/main

            npm ci
            npm run build

            # 3) pm2: 있으면 reload, 없으면 start
            if pm2 describe blog >/dev/null 2>&1; then
              pm2 reload blog --update-env
            else
              pm2 start npm --name blog -- run start -- -H 0.0.0.0
            fi

            pm2 save
blog is the pm2 process name. It must exactly match the name shown by pm2 list on the server.
4-3. Commit and Push
git add .github/workflows/deploy.yml
git commit -m "chore: add CI/CD workflow for home server"
git push origin main
From this point, the Deploy blog-nextjs workflow appears in the GitHub Actions tab and runs on every push.
5. The Deployment Flow in Detail
Running git push origin main triggers the following sequence.
-
GitHub Actions
- Check out the code
- Install Node 20
- npm ci
- npm run lint
- npm run build
- Supabase environment variables are injected from Secrets at this point
-
SSH Deploy Step
- Connect to blog.funq.kr:2222 over SSH with key authentication
- Change to /home/funq/dev/blog-nextjs
- git fetch origin main
- git reset --hard origin/main → the server code exactly matches GitHub main
- npm ci
- npm run build
- pm2 reload blog --update-env → switch to the new code without downtime
-
Nginx
- Continue forwarding traffic to the pm2 process on port 3000
- Users see the new version without an interruption.
6. Trial-and-Error Notes and Troubleshooting
Problems I encountered during the actual setup.
6-1. Missing Supabase Environment Variables
During the first CI build:
Error: Missing Supabase environment variablesCause:
- .env.local existed locally and on the server, but not on the GitHub Actions runner, leaving process.env empty.
- The code was configured to throw immediately if the environment variables were missing.
Fix:
- Save the Supabase URL and Anon Key in GitHub Secrets
- Inject them through jobs.build-and-deploy.env
6-2. npm: command not found
During the SSH step:
bash: line 4: npm: command not found
bash: line 5: pm2: command not found
Cause:
- Node was installed with nvm on the server, but the non-interactive shell opened by GitHub Actions did not run ~/.bashrc or initialize nvm.
Fix:
export NVM_DIR="$HOME/.nvm"
[ -s "$NVM_DIR/nvm.sh" ] && . "$NVM_DIR/nvm.sh"
Add the above to the start of the SSH script to load the nvm environment manually.
6-3. Process or Namespace blog-nextjs not found
During pm2 reload:
[ERROR] Process or Namespace blog-nextjs not foundCause:
- The actual pm2 process was named
blog, but the workflow was callingpm2 reload blog-nextjs.
Fix:
- Use
blogconsistently as the pm2 name, and update the workflow topm2 describe blog/pm2 reload blog.
7. Security Measures Taken
Since I was exposing a home server to the internet, I put basic defenses in place.
-
SSH
- PasswordAuthentication no
- PermitRootLogin no
- Allow key authentication only
- Use external port 2001 instead of 22 through port forwarding
-
ufw
sudo ufw allow OpenSSH
sudo ufw allow "Nginx Full"
sudo ufw enable- fail2ban
- Enable basic jails for nginx and sshd
- Block IPs making excessive login or scanning attempts
Wrapping Up
The flow is now very simple.
로컬에서 코드 수정
→ git commit
→ git push origin main
→ 잠시 후 https://blog.funq.kr 에 새 버전 자동 반영

Comments
Korean and English pages share this conversation.
Loading comments…