
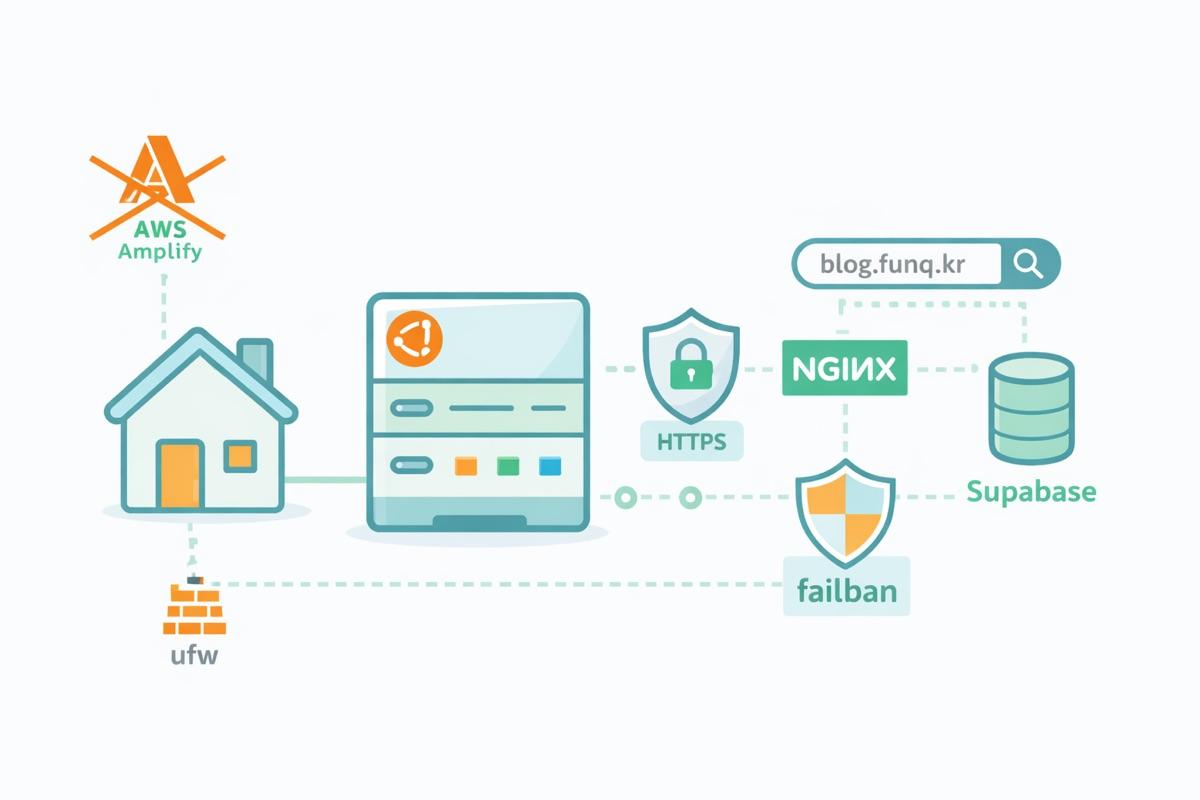
I had been running my blog on Amplify using the AWS free tier. With the account's free-tier period almost over, I considered another free cloud service. But I wanted to try things beyond blogging too, so I decided to set up a server on an old PC in storage.
This post follows the actual order in which I did the work.
- Install Ubuntu Server
- Deploy the Next.js blog code
- Restore the Supabase database backup
- Set up an Nginx reverse proxy and connect the domain
- Enable HTTPS with Let's Encrypt
- Improve security with the ufw firewall and fail2ban
- Organize the code on GitHub and clean up AWS Amplify
0. Target Architecture
I planned roughly the following final setup.
At Home
- Ubuntu Server LTS on a physical PC
- Next.js blog app (npm run start)
- Nginx: reverse proxy from 80/443 to 3000
- ufw + fail2ban
External Services
- Supabase: DB + Authentication (restore the existing cluster backup)
- Domain: blog.funq.kr
Cloud Cleanup
- Delete the existing AWS Amplify hosting
1. Install Ubuntu Server and Set Up the User Account
1-1. Install Ubuntu Server LTS
- Download the Ubuntu Server LTS ISO
- Create a bootable USB on the Mac with balenaEtcher
- Boot the spare PC from the USB and install
During installation:
- Use a regular user account
- Do not log in directly as root; use sudo instead
1-2. Prepare SSH Access
Check the server's IP:
ip addr show
# 또는
hostname -I
# 예: 192.168.0.2
Connect from the Mac:
ssh {{user_name}}@192.168.0.2Most of the work from this point was done over SSH.
2. Install Base Packages and Nginx
sudo apt update
sudo apt upgrade -y

# 필수 툴
sudo apt install -y git curl build-essential

# Nginx
sudo apt install -y nginx
Check Nginx status:
sudo systemctl status nginxOpen http://192.168.0.2 in a browser and confirm that the default Nginx page appears.
3. Fetch the Next.js Blog Source
The blog repository already on GitHub:
On the server:
mkdir -p ~/dev
cd ~/dev

git clone https://github.com/nasodev/blog-nextjs.git
cd blog-nextjs
It initially asks for a GitHub username and password, but a PAT (token) is now required. More on that later.
4. Install Node.js and npm
I recommend installing through nvm instead of Ubuntu's default packages.
# nvm 설치
curl -fsSL https://raw.githubusercontent.com/nvm-sh/nvm/v0.40.0/install.sh | bash

# 쉘 재로드
source ~/.bashrc  # 또는 ~/.zshrc

# Node LTS 설치 (예: 20)
nvm install --lts
nvm use --lts

node -v
npm -v
5. Migrate to Next.js 14.2.35 and Contentlayer2
The original package.json looked roughly like this:
"dependencies": {
  "next": "13.5.8",
  "next-contentlayer": "^0.3.4",
  "contentlayer": "^0.3.4",
  ...
}
A critical security flaw had appeared in Next.js, and version 13 had security vulnerabilities, so I upgraded to version 14.
Security update reference: Next.js Security Update 2025-12-11
- Denial of Service: CVE-2025-55184 (High Severity)
- Source Code Exposure: CVE-2025-55183 (Medium Severity)
5-1. Change Package Versions
Edit package.json:
"dependencies": {
  "next": "14.2.35",
  "contentlayer2": "^0.5.4",
  "next-contentlayer2": "^0.5.4",
  // 기존 next-contentlayer, contentlayer 제거
}
Then delete node_modules and the lockfile:
rm -rf node_modules package-lock.json
npm install
5-2. Update Import Paths
Find uses of next-contentlayer and contentlayer in the source:
grep -R "next-contentlayer" -n . --exclude-dir=node_modules --exclude-dir=.git
grep -R "contentlayer/" -n . --exclude-dir=node_modules --exclude-dir=.git
For example:
import { useMDXComponent } from "next-contentlayer/hooks";Update for contentlayer2:
import { useMDXComponent } from "next-contentlayer2/hooks";Keep uses of contentlayer/generated as they are, while ensuring the path mapping in tsconfig.json still points to .contentlayer/generated.
5-3. Clean Up contentlayer.config.ts
Type issues in the existing MDX configuration caused an “Unused '@ts-expect-error' directive” error for @ts-expect-error during the build.
Clean up that section:
// @ts-expect-error: Typings are not correct for rehype-pretty-code
[rehypePrettyCode, codeOptions],
Rather than suppressing the type error, I left an ordinary comment or loosened the type and removed @ts-expect-error.
// rehype-pretty-code 쪽 타입이 완벽하진 않지만 동작에는 문제 없음
[rehypePrettyCode, codeOptions],
5-4. Build Contentlayer
rm -rf .contentlayer
npm run build
I ran into MDX-related esbuild errors such as this.setData is not a function for a while, but switching to contentlayer2 and cleaning up the configuration resolved them.
6. Migrate the Supabase Project and Restore the DB
6-1. Back Up the Existing Supabase Cluster
The old Supabase project had been paused after a long period of inactivity, and Supabase provided a .backup.gz cluster backup.
Example: db_cluster-11-04-2025@07-17-32.backup.gz
Download the file to the MacBook, then transfer it to the server:
cd ~/Downloads
scp db_cluster-11-04-2025@07-17-32.backup.gz {{user_name}}@192.168.0.2:/home/{{user_name}}/dev/backups/
Decompress it on the server:
ssh {{user_name}}@192.168.0.2
cd ~/dev/backups

gunzip db_cluster-11-04-2025@07-17-32.backup.gz
ls
# => db_cluster-11-04-2025@07-17-32.backup
6-2. Check the Backup Format: pg_restore vs. psql
I initially tried pg_restore:
pg_restore \
  --verbose \
  --clean \
  --no-owner \
  --no-privileges \
  -d "$PGDATABASE" \
  db_cluster-11-04-2025@07-17-32.backup
That produced:
pg_restore: error: input file appears to be a text format dump. Please use psql.
The backup was plain SQL, so it had to be executed with psql rather than pg_restore.
6-3. Create a New Supabase Project and Get Connection Details
Create a new project in the Supabase console:
- Under Settings → Database → Connect
- The Primary Database host may be IPv6-only
- In that case, follow the instructions to use the Session Pooler (aws-…supabase.co:6543) to connect from an IPv4 environment
Example connection details as environment variables:
export PGHOST="aws-xxxxx.supabase.co"   # Session Pooler host
export PGPORT="6543"
export PGDATABASE="postgres"
export PGUSER="postgres"
export PGPASSWORD="실제_DB_비밀번호"    # Database password (reset해서 발급)
export PGSSLMODE="require"
Test the connection:
psql -c '\dt'6-4. Restore the Backup with psql
Since it is a plain SQL dump:
cd ~/dev/backups

psql -v ON_ERROR_STOP=1 -f "db_cluster-11-04-2025@07-17-32.backup"
This error appeared once during the process:
ERROR: role "anon" already exists
The new Supabase project already had an anon role, so CREATE ROLE anon; in the dump failed.
But this did not affect restoration of the remaining tables and data, so without ON_ERROR_STOP:
psql -f "db_cluster-11-04-2025@07-17-32.backup"I ran the command above to let the remaining SQL continue. After restoration, I checked that the data appeared correctly in the Supabase Table Editor.
7. Configure Supabase Environment Variables in Next.js
In the new Supabase project:
- Under Settings → API
- Project URL →
https://<project-ref>.supabase.co - Copy the anon public key
Create .env.local on the server:
cd ~/dev/blog-nextjs
nano .env.local
Contents:
NEXT_PUBLIC_SUPABASE_URL=https://lovvqnqddqivphgsrqanb.supabase.co
NEXT_PUBLIC_SUPABASE_ANON_KEY=여기에_anon_public_키
# 필요 시 서버용 키도 사용 가능
# SUPABASE_SERVICE_ROLE_KEY=...
Caution: values with the NEXT_PUBLIC_ prefix go into the client bundle, so do not put sensitive keys there.
Build:
rm -rf .contentlayer
npm run build
Without Supabase environment variables, I had received Error: Missing Supabase environment variables. Configuring .env.local resolved it.
8. Make the Next.js App Accessible Externally (Bind to 0.0.0.0)
The first time I ran npm run start:
- Local: http://localhost:3000
Only the above appeared, and I could not access http://192.168.0.2:3000 from the LAN.
Cause: Next.js was bound only to localhost (127.0.0.1) by default.
8-1. Test the Server
npm run start -- -H 0.0.0.0The logs then showed:
- Local:   http://localhost:3000
- Network: http://0.0.0.0:3000
With that output, access to http://192.168.0.2:3000 from the Mac succeeded.
8-2. Update package.json
To avoid adding the option every time, edit package.json:
"scripts": {
  "start": "next start -H 0.0.0.0"
}
Now npm run start alone makes it accessible across the LAN.
9. Configure the Nginx Reverse Proxy (80 → 3000)
Next.js listens only on port 3000, but I want external users to access it at http://blog.funq.kr.
9-1. Create an Nginx Server Block
sudo nano /etc/nginx/sites-available/blog-nextjs.confContents:
server {
    listen 80;
    server_name blog.funq.kr;

    location / {
        proxy_pass http://127.0.0.1:3000;
        proxy_http_version 1.1;

        proxy_set_header Host $host;
        proxy_set_header X-Real-IP $remote_addr;
        proxy_set_header X-Forwarded-For $proxy_add_x_forwarded_for;
        proxy_set_header X-Forwarded-Proto $scheme;

        proxy_set_header Upgrade $http_upgrade;
        proxy_set_header Connection "upgrade";
    }
}
Apply it:
sudo ln -s /etc/nginx/sites-available/blog-nextjs.conf /etc/nginx/sites-enabled/blog-nextjs.conf

sudo nginx -t
sudo systemctl reload nginx
Opening http://192.168.0.2 now shows Next.js through Nginx.
10. ipTIME Port Forwarding and Domain Setup
10-1. Set Up Port Forwarding on the Router
On the ipTIME admin page at http://192.168.0.1:
- Advanced Settings → NAT/Router Management → Port Forwarding Settings
Add a rule:
- Service name: blog-http
- Internal IP: 192.168.0.2
- Internal port: 80
- External port: 80
- Protocol: TCP
If you plan to use HTTPS too:
- Service name: blog-https
- Internal IP: 192.168.0.2
- Internal port: 443
- External port: 443
- Protocol: TCP
10-2. Point the Domain to the External IP
In the domain's DNS settings:
- Type: A
- Host: blog
- Value: the home's external IP (for example, 220.126.174.1)
The site is now accessible externally at http://blog.funq.kr.
11. Enable HTTPS with Let's Encrypt and certbot
11-1. Check the ufw Firewall
sudo ufw statusExample:
Status: active

To            Action  From
--            ------  ----
OpenSSH       ALLOW   Anywhere
Nginx Full    ALLOW   Anywhere
3000/tcp      ALLOW   Anywhere
...
If Nginx Full is allowed, ports 80 and 443 are already open.
In production, it is best to block external access to 3000 and use it internally only.
11-2. Install certbot
sudo snap install core
sudo snap refresh core

sudo snap install --classic certbot
sudo ln -s /snap/bin/certbot /usr/bin/certbot

certbot --version
11-3. Issue a Certificate with the Nginx Plugin
sudo certbot --nginx -d blog.funq.kr- Enter an email address
- Agree to the terms
- Choose redirect (2) when asked about automatic HTTP → HTTPS redirection
After success, the Nginx configuration automatically includes:
- A server block redirecting 80 → 443
- A 443 SSL server block
- Use of
/etc/letsencrypt/live/blog.funq.kr/fullchain.pem
These entries are added automatically.
11-4. Verify HTTPS
In the browser:
- Open
https://blog.funq.kr - Check the padlock in the address bar
- Confirm that
http://blog.funq.krautomatically redirects tohttps://
Also in the terminal:
curl -I https://blog.funq.krAn HTTP/2 200 response means it is working.
12. Review the ufw Firewall Rules
I used ufw to manage the firewall.
12-1. Basic Rules
sudo ufw allow OpenSSH
sudo ufw allow 'Nginx Full'   # 80, 443
# (개발 중일 때만) sudo ufw allow 3000/tcp

sudo ufw enable
sudo ufw status
Closing port 3000 is recommended in production:
sudo ufw delete allow 3000/tcpA reliable setup exposes only 80/443 externally and lets only Nginx access Next.js on port 3000.
13. Nginx Logs and the Internet's “Background Noise”
Once the server is exposed externally, entries like these begin appearing in access.log:
165.22.34.189 - - [13/Dec/2025:20:39:10 +0900] "GET /server-status HTTP/1.1" 301 178 "-" "Mozilla/5.0 (l9scan/...; +https://leakix.net)"
138.68.86.32 - - [13/Dec/2025:20:39:11 +0900] "GET /@vite/env HTTP/1.1" 404 12707 "-" "Mozilla/5.0 (l9scan/...; +https://leakix.net)"
138.68.86.32 - - [13/Dec/2025:20:39:13 +0900] "GET /actuator/env HTTP/1.1" 404 12708 "-" "Mozilla/5.0 (l9scan/...; +https://leakix.net)"
Rather than someone specifically targeting me, this is closer to background noise from scanners such as LeakIX and l9scan sweeping the internet.
- Repeated requests to paths such as
/server-status,/actuator/env,/@vite/env, and/login.action - If the server returns 404/301 correctly and no vulnerable service is actually present, there is no damage
It still felt unpleasant, so I added fail2ban next.
14. Protect SSH and Nginx with fail2ban
14-1. Install
sudo apt update
sudo apt install -y fail2ban

sudo systemctl status fail2ban
14-2. Configure Jails (SSH and Some Nginx Protection)
Custom configuration file:
sudo nano /etc/fail2ban/jail.d/local.confStart by enabling at least sshd:
[sshd]
enabled = true
port    = ssh
logpath = /var/log/auth.log
backend = systemd
After saving:
sudo systemctl restart fail2ban
sudo fail2ban-client status
sudo fail2ban-client status sshd
If it is working:
- Jail list: sshd
- Status values such as Currently banned and Total banned appear
To add Nginx protection later:
[sshd]
enabled = true
port    = ssh
logpath = /var/log/auth.log
backend = systemd

[nginx-badbots]
enabled  = true
port     = http,https
logpath  = /var/log/nginx/access.log
maxretry = 10
After adding it, run again:
sudo systemctl restart fail2ban
sudo fail2ban-client status
sudo fail2ban-client status nginx-badbots
If you need to unban an IP:
sudo fail2ban-client set sshd unbanip 1.2.3.415. Configure Git and Push Changes to GitHub
Apply the changes made locally to the GitHub repository.
15-1. Set Git User Information
My first commit attempt produced Author identity unknown, so I configured the global user settings.
git config --global user.name "Lee hwankyu"
git config --global user.email "hklee03@cafe24corp.com"
15-2. Check Changed Files
cd ~/dev/blog-nextjs
git status
Example:
modified:   components/Blog/RenderMdx.tsx
modified:   contentlayer.config.ts
modified:   next.config.js
modified:   package-lock.json
modified:   package.json
Revert build outputs such as sitemap-0.xml:
git restore public/sitemap-0.xml15-3. Stage and Commit
git add \
  components/Blog/RenderMdx.tsx \
  contentlayer.config.ts \
  next.config.js \
  package.json \
  package-lock.json

git commit -m "chore: upgrade Next.js 14.2.35 and migrate to contentlayer2"
15-4. Push with a GitHub PAT
GitHub no longer allows pushing with an account password, so create a Personal Access Token (PAT) and use it in place of the password.
- GitHub → Settings → Developer settings → Create a PAT
- Permission: Contents: Read and write for the repository
On the server:
git push origin mainAt the prompt:
- Username: nasodev
- Password: the PAT string you created
After success, check that the commit appears on GitHub.
16. Clean Up AWS Amplify
Once the blog was running reliably on the home server and Supabase, I removed the old AWS Amplify Hosting setup.
- AWS Console → Amplify → Select the app → Delete app
- Check Billing → Bills for any other services still incurring charges
Wrapping Up
The result:
- With one spare PC and Ubuntu Server,
- plus Next.js 14, Supabase, Nginx, HTTPS, a firewall, and fail2ban,
- I built a personal blog server at home that feels like a real production setup.
What I Gained:
- Hands-on Supabase backup and restore experience, especially Session Pooler and IPv4/IPv6 issues
- A Next.js version upgrade and Contentlayer2 migration
- Full-stack server operations with an Nginx reverse proxy, domain, and HTTPS
- Firsthand experience of actual logs and scanning patterns after exposing a server to the internet
- Practical knowledge of firewalls, fail2ban, GitHub PATs, and similar details
The server has now become a useful “practice ground” that can expand beyond the blog into side projects and infrastructure experiments.
With a spare PC, an internet connection, and a domain, anyone can build a “small cloud” at home. What you learn in the process can also be applied directly to infrastructure at work.
GitHub: https://github.com/nasodev/blog-nextjs
Leave a comment if you have any questions!



Comments
Korean and English pages share this conversation.
Loading comments…